Cracking up? – 31 Oct 2015.

Ever since I have had the Fire Bike there have been some cracks in the left hand side of the fairing. I think that the bike must have fallen over at some time. I wasn’t sure if these had opened a bit lately.

DSCF1825-1

DSCF1824-1

It seemed to me that the mounting bracket “U-shape” that goes against the fairing wasn’t mounted square and might be putting pressure on the fairing and pulling open the cracks.

DSCF1826-1

However, when I removed the hardware on that side nothing “sprung”. I cleaned up the parts and replaced the rubber washers.

DSCF1827-1

I put it all back together again trying to keep the mounting flush against the inside of the fairing. This started off fine but once the fixings were tightened it all moved back to the old position.

I’m not sure what to do about the damage. Cracks which appear on the outside around the top screw don’t appear to penetrate through to the inside. There are cracks around the bottom screw on the inside but nothing much on the front. I’ll have to give it more thought.

Throttle, Instruments and Cables – 29 Oct 2015.

Throttle and grips.

My cupboard of parts for Rhino is getting empty as I continue to fit more items to the bike. My little granddaughter has been most concerned about the tennis ball temporarily pushed on the left handlebar end. Now I’ve fitted the throttle and handlebar grips.

The grips are not the original type but have an octagonal profile and are the same as was fitted to the bike when I first got it 36 years ago! They were nice and squashy and I always regretted cutting them off in the early days. They’re by Tommaselli and are called “Silky” grips.

DSCF1862-1

The throttle isn’t the original type either but has been on the bike all the time I’ve had it. I think the original was by Magura but was often changed to a Tommaselli Daytona throttle like mine. They were standard on some later Guzzi models.

I fitted the throttle cables to the carburetors then fed them up through the rubber boot for the twist grip and onto the drum. You can then get the drum into the halves of the throttle twist grip and put it together around the handlebar. The cable boot is held in place by trapping part of it between the two halves before screwing them together.

DSCF1863-1

Just doing up the throttle halves won’t clamp it to the handlebar. You have to tighten the grub screw in the underside of the throttle into the bar.

DSCF1864-1

The knurled screw with the spring behind it is a damper. When screwed in it prevents the throttle slamming shut when you let go of it – very useful when making right-hand hand signals. I don’t have indicators fitted to this bike.

The upper adjusting screw with a lock nut is to limit the travel of the throttle cables. The idea is to adjust it so that the throttle can’t continue to pull on the cables once they have reached the end of their travel. On the V7Sport you just need to make sure it’s not preventing the carbs from being fully opened.

DSCF1868-1

I think I should mention something about routing the throttle cables. Originally Moto Guzzi routed both cables down the right hand side of the steering head and under the tank. However, the best way is to send one cable down each side of the steering head so they then cross over the top frame tube to the carburetor on the other side. All this is to try and get the route which provides the lightest throttle action. You can (or could) get lighter springs for the carb slides but I’ve never felt the need. Even with my dodgy wrist I still think I’ll be OK.

DSCF1867-1

DSCF1865-1

DSCF1876-1

I use some self-amalgamating tape to hold the cables in place.

The instrument cluster.

Ever since the parts came back from powder-coating I have agonised about whether to try and expose the lettering on the front of the warning light housing. Originally these were painted satin black with the raised lettering left as plain aluminium. In the end I went ahead and am pleased I did. I masked as much of the housing as I could before removing the powder-coat with fine wet and dry paper used wet.

DSCF1877-1

DSCF1878-1

DSCF1879-1

Once satisfied, I carefully applied the decal.

DSCF1880-1

DSCF1882-1

It was then time to fit the speedometer and tachometer cables which both fit in the same way. I did the speedometer first.

The cables come with the instrument connector ready fitted to the outer cable. The drive end of the cable has the plastic removed from its outer casing and the fixings are loose. The rubber “boot” and knurled lock-ring are slid on and then the olive is put on the stripped part of the outer cable.

DSCF1870-1

Start with the drive end and seat the outer cable in the drive with the olive against the top of it. Twiddle the inner cable till it slips into the drive. The knurled ring is then tightened down squashing the olive onto the exposed cable which is then held in place by the lock-ring. The rubber boot can then be pushed into place.

DSCF1871-1

DSCF1872-1

The other end can then be fitted to the speedometer head. Sometimes you have to jiggle things a little to get the inner cable to fit in.

I find that, if a cable is going to break, it’s close to the drive end and seems to be because water gets in somehow. As a belt-and-braces measure I wrap a little self-amalgamating tape around the top of the cable boot.

DSCF1873-1

When I fitted the tachometer cable I just couldn’t get it to fit properly and found out that it was a bit long. Here I’ve routed it under the lower fork yoke.

DSCF1881-1

You can’t easily shorten the cable because the inner is pressed into the square drive shape and I think you need special tools for this. I measured the inner cable I had been sent as 590mm. I checked Gutsibits website and found they list two cables for the V7Sport of 588 and 548mm inner length so I ordered the shorter one.

Bringing you up to date. Part 2 – 7 Oct 2015.

As promised, I’m back to let you know what’s been happening with The Fire Bike, my V7 loopframe.

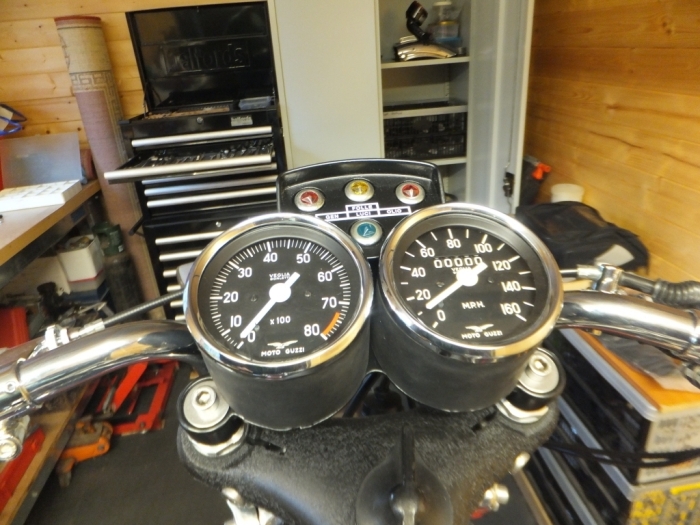
An MPH speedometer that works.

Around here it’s important to have an accurate speedometer. Fixed speed cameras, mobile camera vans and other gizmos are there to lighten our wallets if we get it wrong. This bike, being an import to the UK, came with a KPH only speedometer. This is perfectly legal on a bike built before 1986. It has to have a speedo but there are no rules about it showing miles per hour. Trouble is that all our signs and speed limits are posted in MPH. A while back, to avoid having to make calculations in my head, I stuck bits of Dymo tape on the speedometer glass to show speeds up to 70MPH which is the highest of the national speeds limit here.

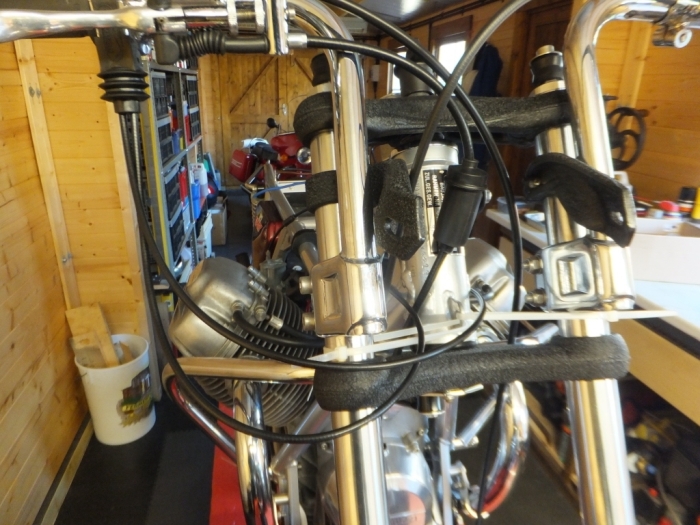
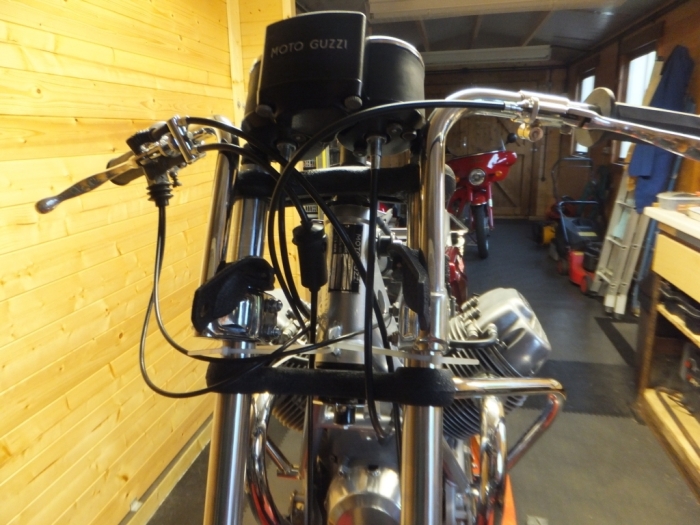
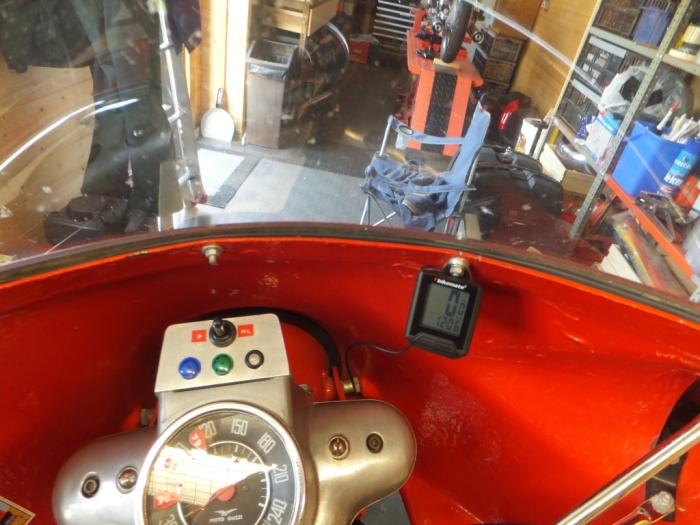
However I’ve noticed that the speedometer reads well over the actual speed I’m doing. I know all vehicles read high but, in this case, it really is well over. Locally, there are some signs which flash up your speed as you approach them. They would show 24 when I was riding at 30. My answer was to fit a bicycle speedometer. It cost me all of £5 and I made a bracket to fit it in the fairing in such a way that it can’t be slid off its mount.

DSCF1687-1

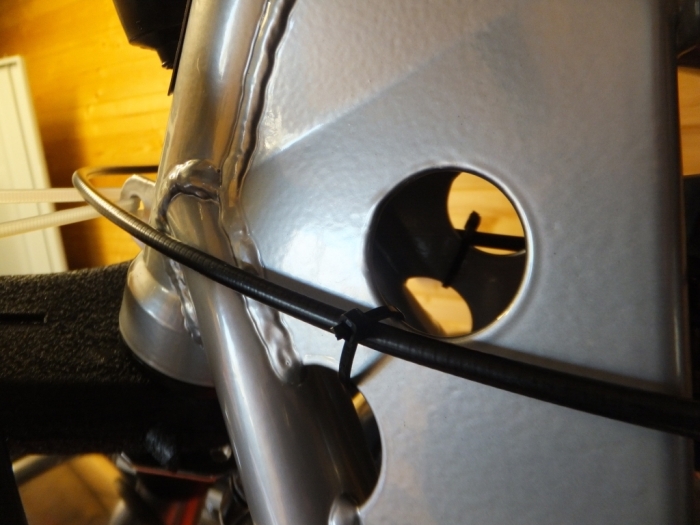
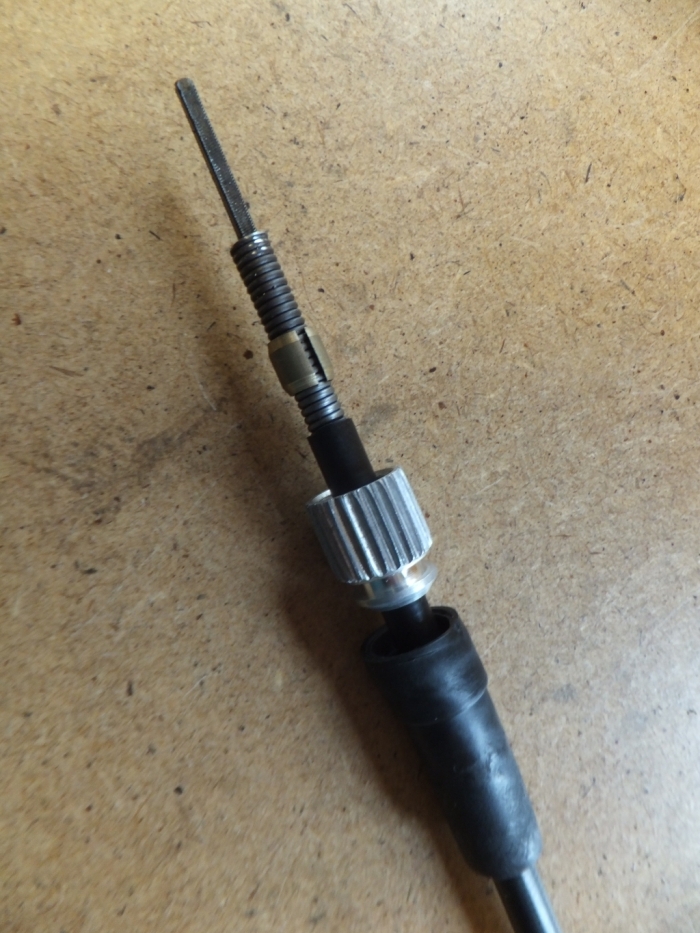
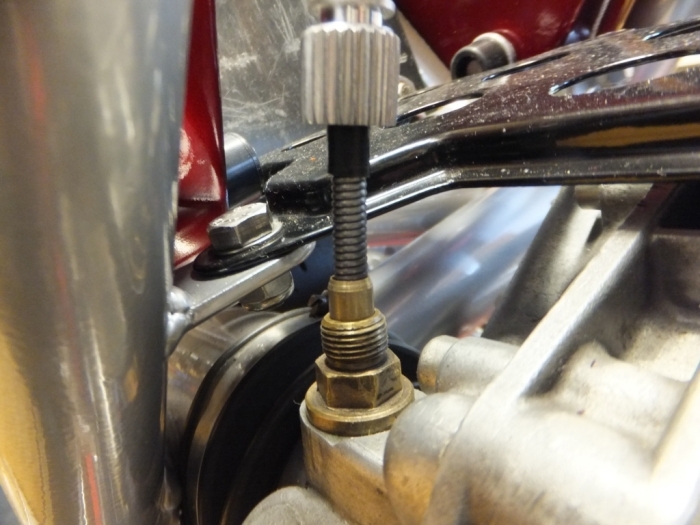
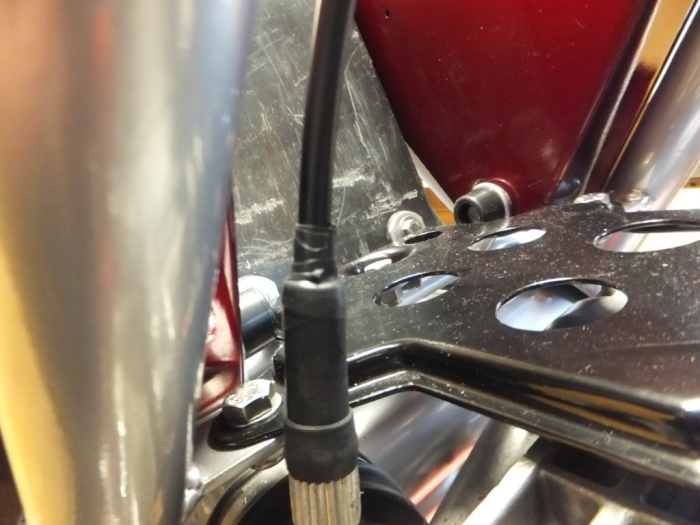
The sender normally would get its signal from a magnet attached to a spoke but, this won’t work here as the spokes are too chunky and the magnet would be much too far away from the pick-up. My solution was to buy some cheap magnets off ebay and to stick one to the rim with “Stixall”, a silicone adhesive. It was positioned opposite the valve hole to help balance it. A bracket was made to mount the pick-up to the mudguard mounting screws on the right hand fork leg.

DSCF1686-1

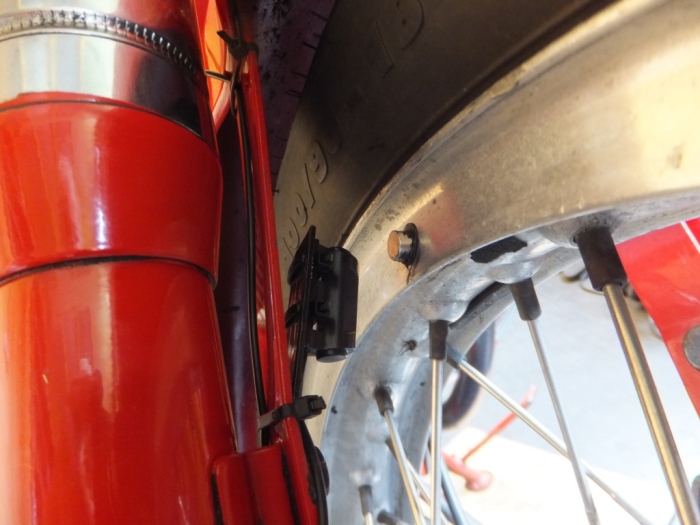
The bicycle speedometer is self contained with its own battery and goes to sleep when not used for a few minutes. It wakes itself up when the wheel movement triggers the sensor. It was calibrated by marking the tyre sidewall, rolling the bike forward one wheel revolution, measuring the distance traveled and inputting this figure as per the instructions. There are a lot of other redundant functions but the clock is handy. You can also set a trip milometer but I shan’t bother.

It has been a success. The reading is accurate, reading just 1MPH over when showing 40 i.e. I’m doing 39MPH. You can’t read it at night but never mind. The magnet has, much to my surprise, stayed well and truly stuck to the wheel as well.

Cheap topbox.

I have a couple of old but sound 36 litre Givi cases but nothing to mount them to. You’re talking about £45 for a universal mounting plate which isn’t too bad but, my boxes are still too small to put a helmet in when I leave the bike. I also need more space for camping gear because the bike’s panniers are so small. I found I could get a cheap Chinese made 46 litre top box with quick-release mounting plate for £40 so got one of those. It’s definitely not made anywhere near as as well as a Givi box but was less than a quarter of the price. I mounted the universal plate to my chrome rack.

DSCF1696-1

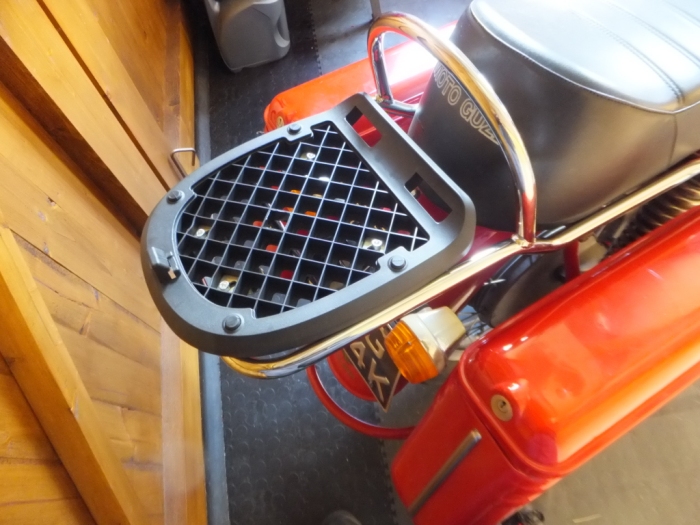
Then fitted what is a pretty massive box.

DSCF1699-1

DSCF1698-1

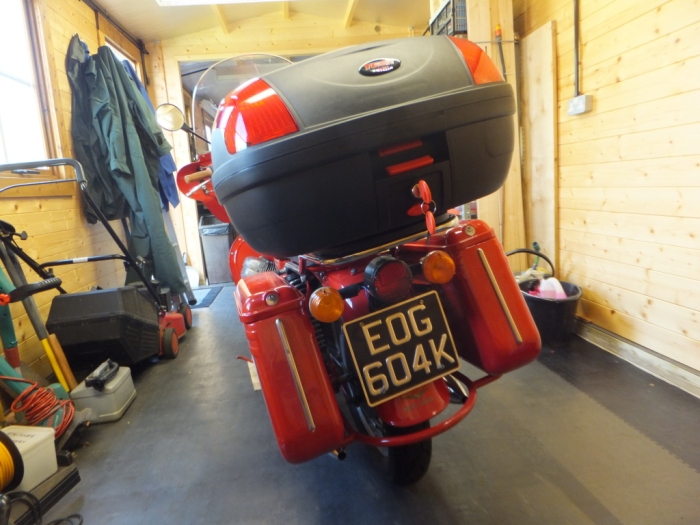
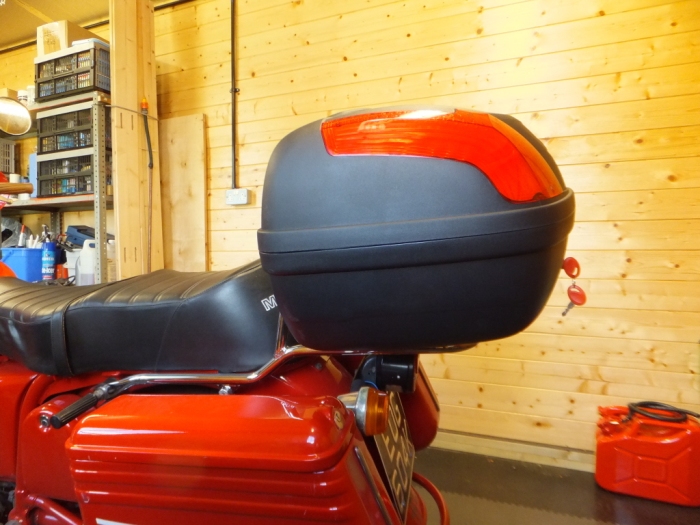
I know it looks a bit out of place but it’s functional and feels secure on its mounting. I only fit it as needed and have used it empty as somewhere to put my helmet or jacket (helmet then ends up secured with a cable lock as before). I also used it to carry camping gear for the V-twin rally in August. That time, I also strapped the box to the rack as a belt-and-braces measure. I could just shove a bolt through box and rack but, the design of the original panniers means the box has to come off to get them fully open. They can still be partially opened with the box on and you can just about fish around for stuff.

I’ll consider fitting lights to the box because it overhangs the existing ones. If you’re sat in a car behind the bike, the lights are visible but they might be hidden from someone sitting in a higher position and closer behind.

MOT test time.

In the UK the MOT is the annual road-worthiness test. Toward the end of September I took The Fire Bike to my usual tester who was as thorough as always. The bike passed easily with no advisory notices. He agreed with me that there is the slightest bit of play in the rear wheel bearings but, wasn’t concerned.

I was interested to see how the bike would fare on the brake testing rollers. With the tester sat on the bike each wheel is weighed. Each brake is applied incrementally to ensure it works progressively, doesn’t grab or stick on. It’s then fully applied to test its efficiency. Apparently the front of the bike weighs about the same as a modern sports tourer. The braking efficiency of the front twin leading shoe drum brake is also on a par with a modern disk set up. The downside is that brake fade is more likely from a drum than disks which are able to shed the heat more easily. The rear end of the bike is some 25Kg heavier than a modern sports bike. The efficiency of the rear single leading/single trailing drum brake is close to the efficiency standard of disk brake with the same caveat about brake fade.

Having got my MOT pass I was able to go home and tax the bike for another year. This is compulsory but free as the bike is registered as an historic vehicle due to its age.