More money than wit? – 18 Nov 2023.

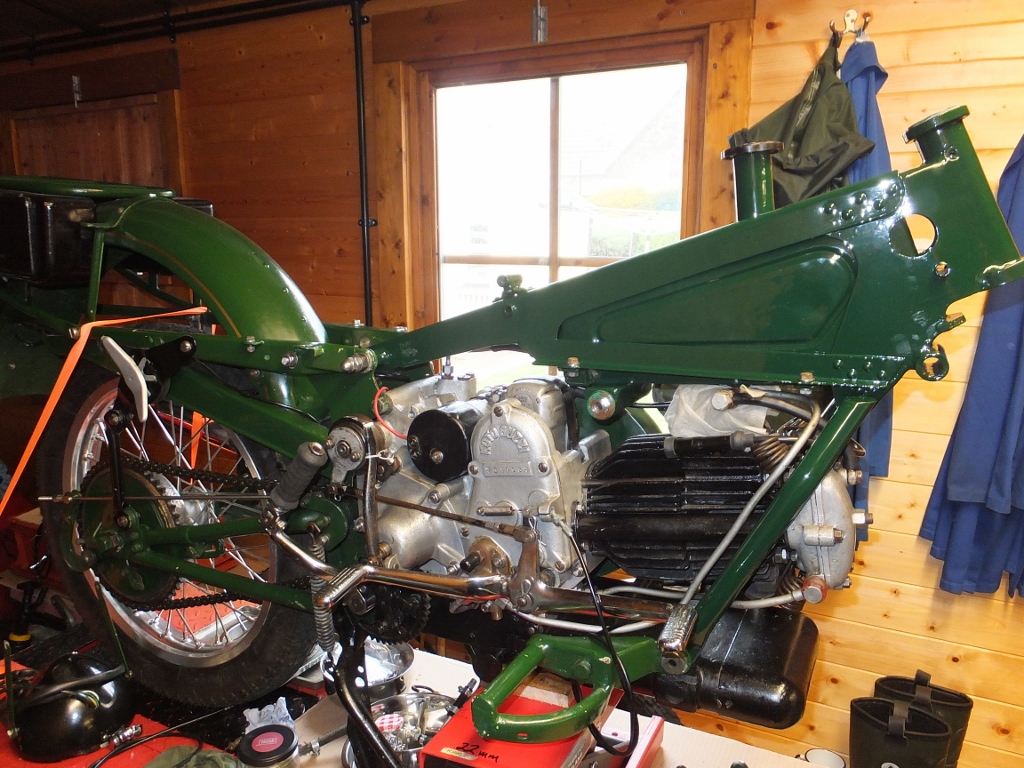
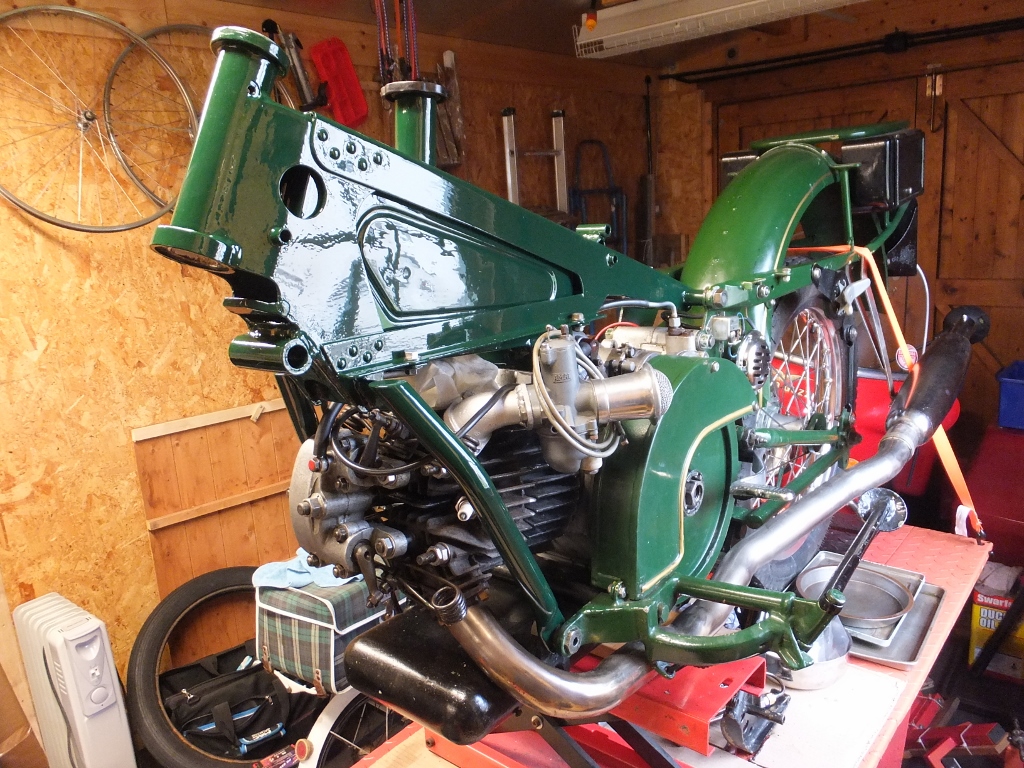
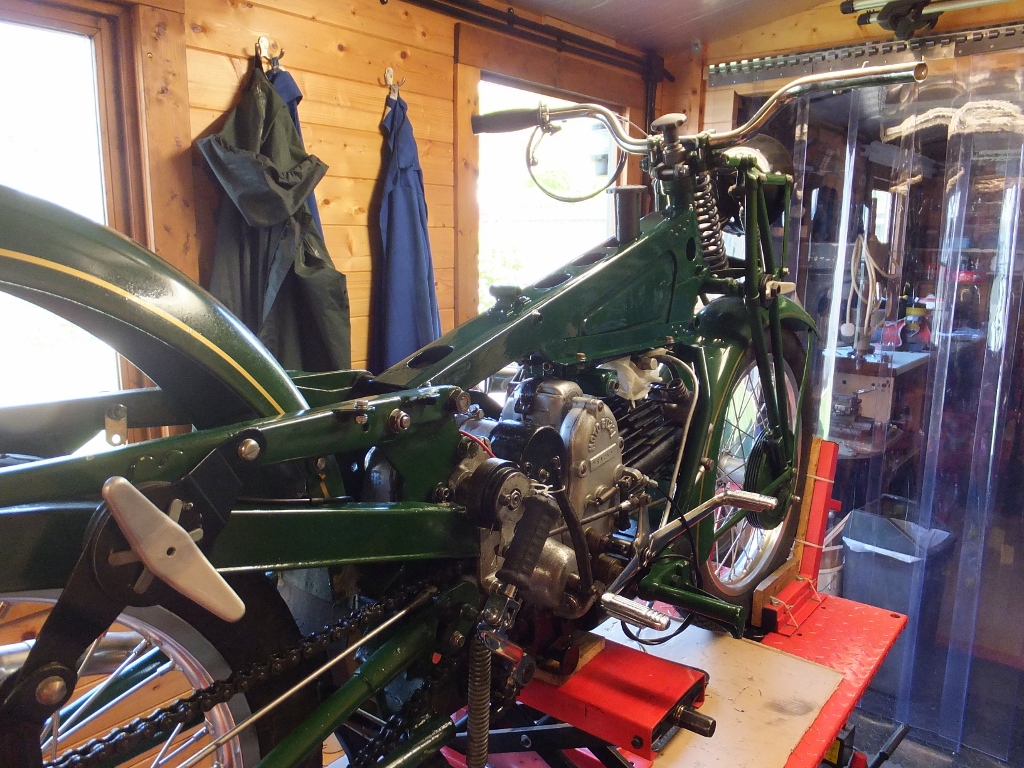
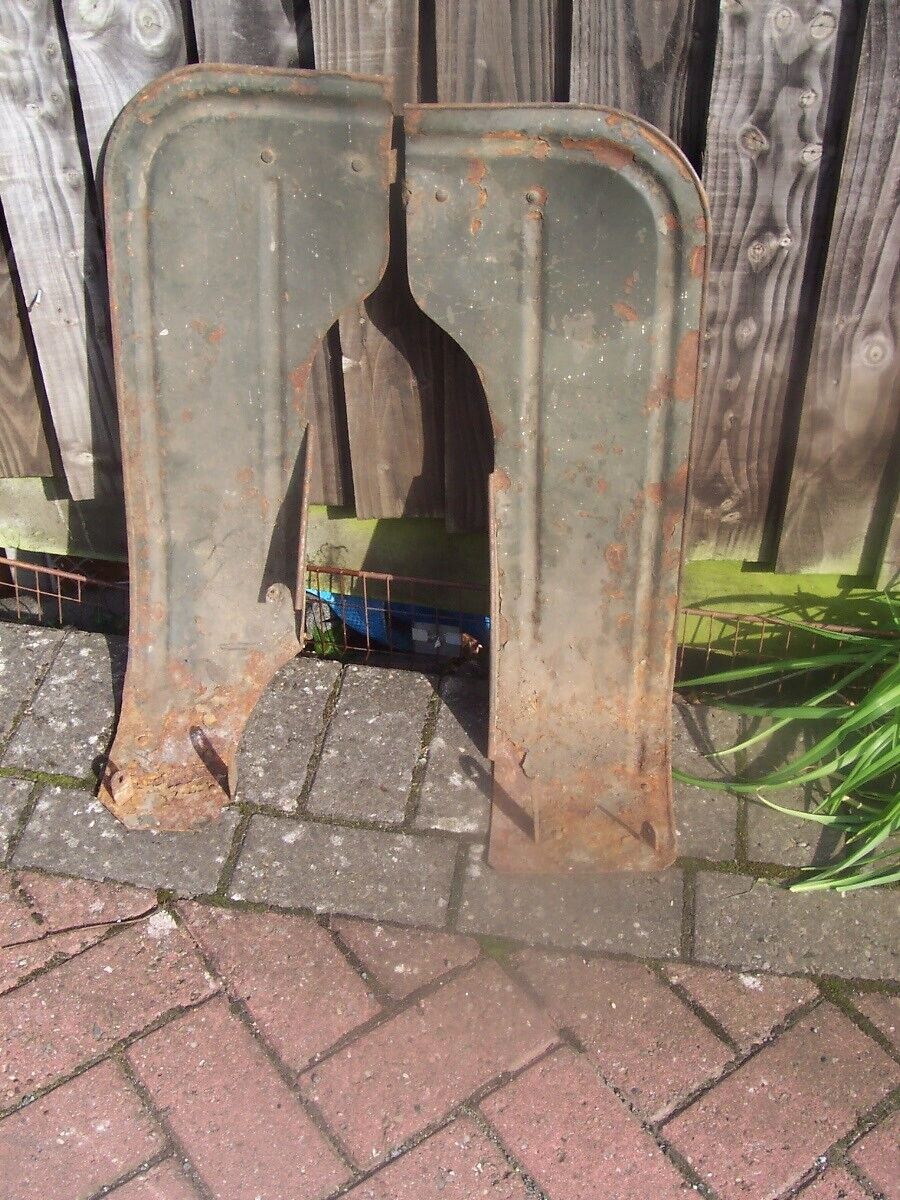
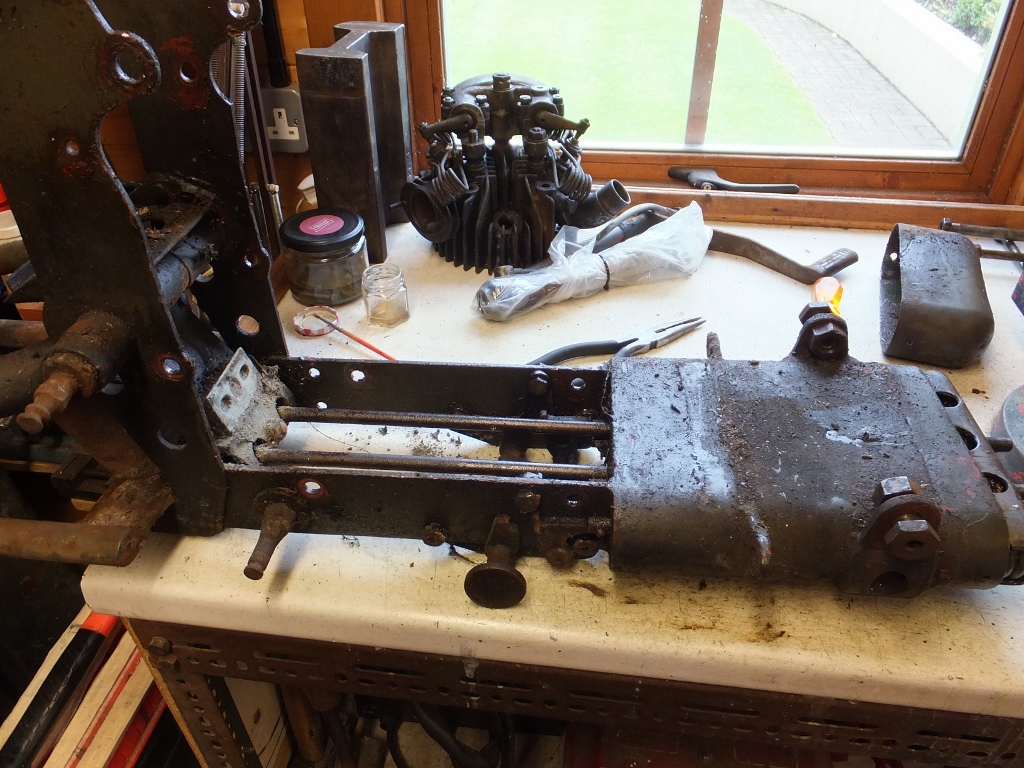
Having mostly got up to date with what’s been happening in the shed there’s one more tale to tell. I saw the reamains of a Superalce for sale on that well known auction site and ended up winning it. I travelled into England to collect the parts and have spent a week or so dismantling, cleaning and storing the parts. Despite being short on space I’m salting the parts away. You never know…

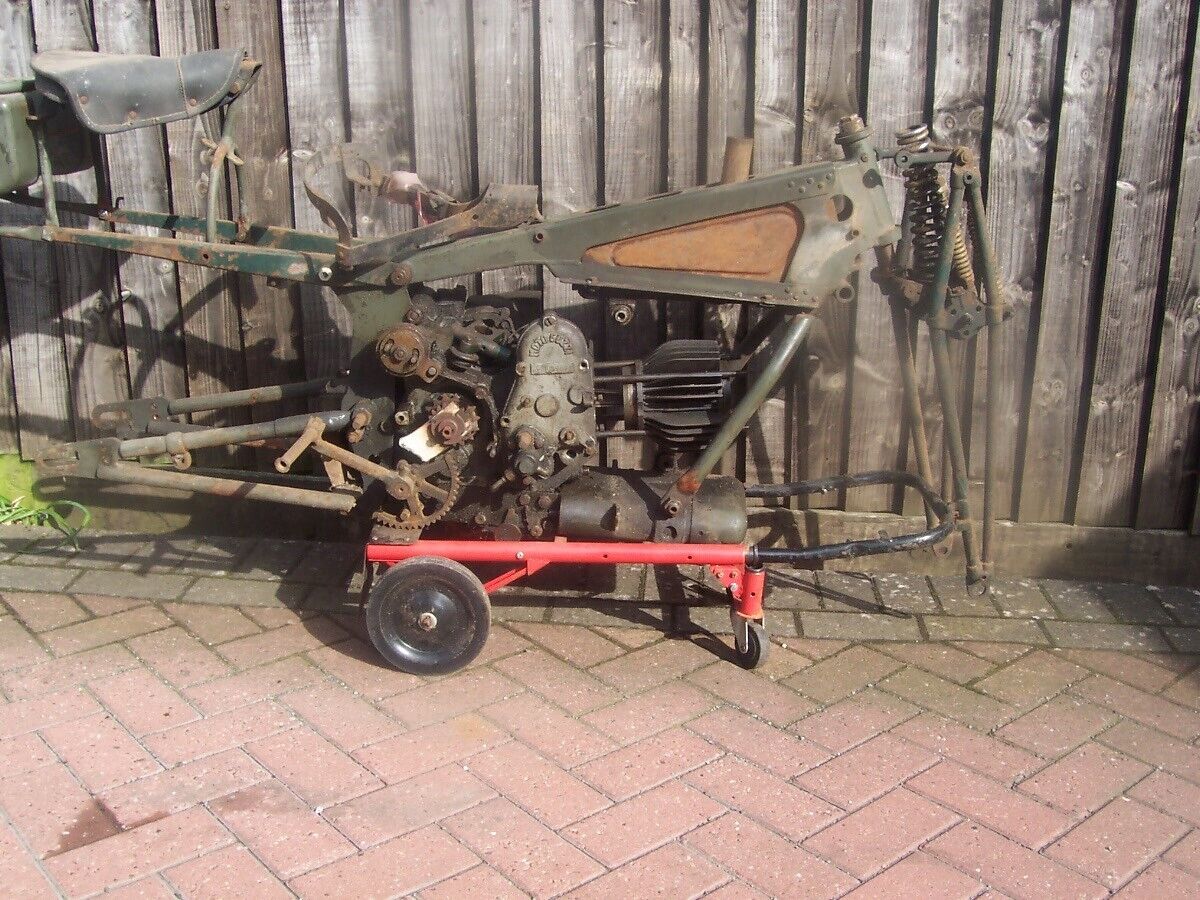
Anyway there’s a set of leg shields, the skeleton of a pillion seat, a complete gearbox and most of an engine. There’s a frame and some fork parts as well.

I do actually ride my bikes as well.

Early in the summer all the bikes, V7 700, the V7Sport and the BSA (for I still have it) were treated to a service and readied for use. The trailer also got a going over – bearings greased etc.

On the Fire Bike (V7 700) I found that the rear brake pedal wasn’t fully returning again although it wasn’t making contact and dragging. Setting to with penetrating fluid and plenty of wiggling the pedal seemed to cure that but I think I’m going to have to come up with a proper cure for this. Perhaps I should drill the mounting in the frame and fit a grease nipple. I’ll give it some thought.

The Racing Rhino’s (V7sport) clutch woes seem to have gone away after I gave it a white spirit bath. The BSA was treated to anew front tyre.

I attended the usual local bike nights when I could and went for a few rides with no particular purpose. As you do.

I managed to get to three MGCGB events this year. The Summer Camp in July which was one of the wettest weekends I’ve spent under canvas for a long time.

In August I hitched up the trailer and went over to Derbyshire for Guzzifest. This was much more pleasant.

Finally, in September it was time for the Red Kite Weekend here in Wales. It was another soggy weekend but this time I had a room in the hotel. While that meant I didn’t have to deal with all that wet equipment I did feel a little cut off from everyone else.

Superalce fuel tank paint – 1 Sep 2023.

Here’s another late post! After getting my car electrics sorted out I got back to my painting. You may remember that I’m brush painting the bike with coach enamel. This is pretty laborous especially on relatively small parts – I mean small as opposed to car bodies, canal boats etc.

Before stripping off the existing paint to see what delights lay beneath I refitted the knee grips to the tank and took a good few snaps to remind me of where the decals were. They’re not original anyway but the knowledge might be useful one day.

I made up a couple of different wooden brackets so that could hold the tank while I work on it. Then I set about stripping the old paint. I got going with various abrasives, the heat gun and used Jenolite chemical rust remover then rust converter after that to make sure nothing active was left in any pits in the metal. I found some filler as well. There was filled dent in one of the tanks flanks and filled rust pits which hadn’t been fully cleaned out and were still active. I dealt with these and think I was more than thorough.

There was also an area of untidy braze around one of the fuel tap bosses. I tidied it up a bit but decided it was probaly best not to play with it too much. Once the tank was bare metal I filled it with paraffin again just to check there were no nasty surprises. I needn’t have worried.

Of course, having removed all the old filler, I had to re-do it. Once upon a time I was good at this having owned many old rusty cars. However, I found I’d lost the nack and it took several goes to get it right. After cleaning, degreasing, cleaning again and tack-ragging the tank was given two good coats of primer, sanded and given one more.

Three coats of undercoat followed but something went wrong and I ended up sanding it back quite a lot before giving it another go.

Three top coats were applied after flatting back. I think the finish is acceptable but I might flat it again and have another try some time. Not now though.

I have found that it’s easiest to paint the vertical surface of the tank then turn it over on my “spit and do the next part that’s now become vertical. As I go I’m working quickly trying to keep a wet edge. If you paint the nice easy top surface there’s a good chance of the paint running when you turn it to do the next bit. It’s what works for me anyway.

Tidying up a bit – 1 June 2023.

Before I could move on to the next stage of painting the Superalce petrol tank I needed to put as much of the bike back together again as I could. There were just too many parts littered about the garage. It’s a nice sized workshop but, as is always the case, my “junk” has expanded to fill the space available!

After cleaning the paint off the oil pipe connection points on the newly painted tank I fitted it back in the frame. I haven’t done the fixings up tight in case I need to adjust the fit when I eventually come to mount the fuel tank. I’m pretty sure the new paint will encourage the two parts to stick together.

I cleaned up fixings as I progressed, removing flaking paint and remaking one bolt. The frame complete with tank was carefully mounted back on the rest of the bike while trying to save the new paint.

Next the forks had to go back on. The only difficulty here was keeping the loose ball bearings in the lower head set from stacking on top of each other. Being all nice and greasy they tended to stick to each other. 20 balls in the lower bearing and 19 in the top one. It took several goes but I got there in the end. I made up a 34mm spanner for the top nut.

the front mudguard and wheel were soon back on as were the handlebars and headlamp. The front wheel looks much better aligned now.

The oil pipes were refitted. The one from the rear of the oil tank is an absolute pain to get back on. I removed it completely to allow me to get the difficult end at the tank started. I used every 14mm spanner I posessed trying to do this up. In the end I filed down the outside of a 14mm flare-nut spanner which finally allowed me to get it done up tight.

To keep things safe I connected up all the control cables and refitted the wiring. This showed up another issue. The clutch cable incorporates an adjuster at the gearbox end. It’s M8x1.0pitch. However I have found that the thread in the engine casing is, in fact, M9x1.25. The adjuster is also missing a locknut so I made one (M8x1.0 still) so at least it won’t put pressure on the threads in the casing. I’ll have to get another cable made. There’s also a release bearing made of small balls which I cleaned and stuck together with new grease. Looking at the operation of the clutch I would say it’s new-ish.

It’s on to the fuel tank next. You’ll probably notice that I’m writing this June update in November. What can I say? I’ve got a bit behind!